Installing a 3D aquarium background
The installation of a 3D back wall is very simple, but requires some manual skill. If you do not want to install the back wall yourself, experienced aquarium builders offer the installation service when ordering the aquarium.
Step by step
These are very easy step-by-step instructions on how to install a Back to Nature background in an aquarium. Please read through the whole article first, and also the various tips on the list to the right, before you install a background, because many tips are related to this particular article, and you may have to do some things before you finally mount the background.In this article we will install a Amazonas background with the dimensions of 120 x 50 cm in an aquarium.

Upside down?
First you must decide how you want to install your background. The Back to Nature rock backgrounds there is no upside down (or right or wrong). Decide what will be the most aesthetically pleasing to you. The Amazonas backgrounds are fix because of the wood root.
Cutting
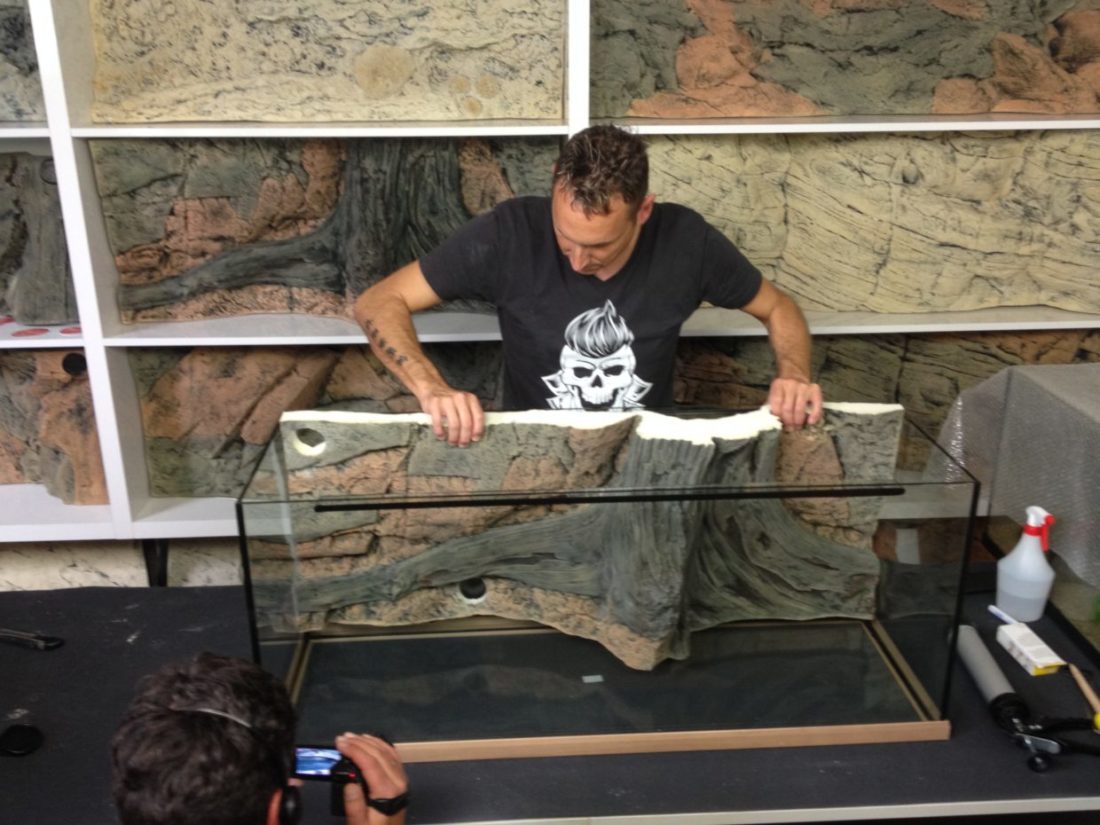
Place the background behind the aquarium so the edge of the background is placed in line with the inside of the aquarium. Take into account the thickness of the glass, it’s inside of the aquariums dimensions that matter. Use the aquarium for support and draw a vertical line using a felt pen. Cut with a saw. Place the background inside the aquarium. Check to make sure the background fits inside the aquarium. If not, you will have to adjust it by carving a little with the knife. you can also use a plane or a coarse file.

Cutting
Sometimes there are parts of the aquarium that can get in the way, such as central bar or various reinforcement straps. Measure where the contractor is in the background and cut to fit. The background now fits the aquarium perfectly. In this case, the horizontal glass strap will also help to hold the background to place.
Insert
Fasten the background into position. Use a couple of sticks or something, between the background and the front glass to hold it in place. We used strips of the material that we cut away before. It is very important that the background sits still for the next step. Now glue the bottom and the sides of the background against the glass using aquarium silicone. It’s often hard to reach to some spots when applying the silicone. A tip to make it easier is to bend the spout. Wait for 12 − 24 hours until the silicon has cured. Then you can start up the aquarium. Enjoy your brand new Back to Nature background! One great advantage of the Back to Nature backgrounds is that you can make your own biological filter behind the background. These filters are more efficient than conventional filters on the market, simply because of the huge volume. It may also be cheaper, and they will last for up to 10 years without needing to be cleaned. Read about making a filter behind the background.
Gluing
Clean the glass surfaces before gluing. The background must musxed into position with filter foam or wood rots. When the background is fixed in the aquarium use aquarium silicone to glue the background. Tip: heat up the nozzle of the silicone syringe and form these L-shaped. Then you can use the silicone easy toglue between glass and back wall. The side seams can be covered with aquarium gravel, sand or peat.
If the aquarium is higher than the back wall becomes filter foam or a foam board
up to 10cm in height. In the middle all 3D back walls should be glued on a glass strip
or a hard foam plate to the glass bottom. The free space under the background can be filled up with filter foam. Glued the foam to the glass bottom and the back wall. Cut away overlapping foam ialong the back wall. Cover the foam with silicone and spread it with aquarium gravel or coarse sand. Wear disposable gloves.
Covering silicone seams
After gluing the background, the fresh silicone seams are still covered with sand, peat or colour pigment. A disposable glove protects against impurities on your hands. Scatter the sand or peat as opaquely as possible on the fresh silicone seam. Then gently tupthes the substrate into the silicone to improve adhesion. The cover is ready!
Allow the silicone to cure for 12-24 hours. After that, the aquarium can be filled.

Inlet grills
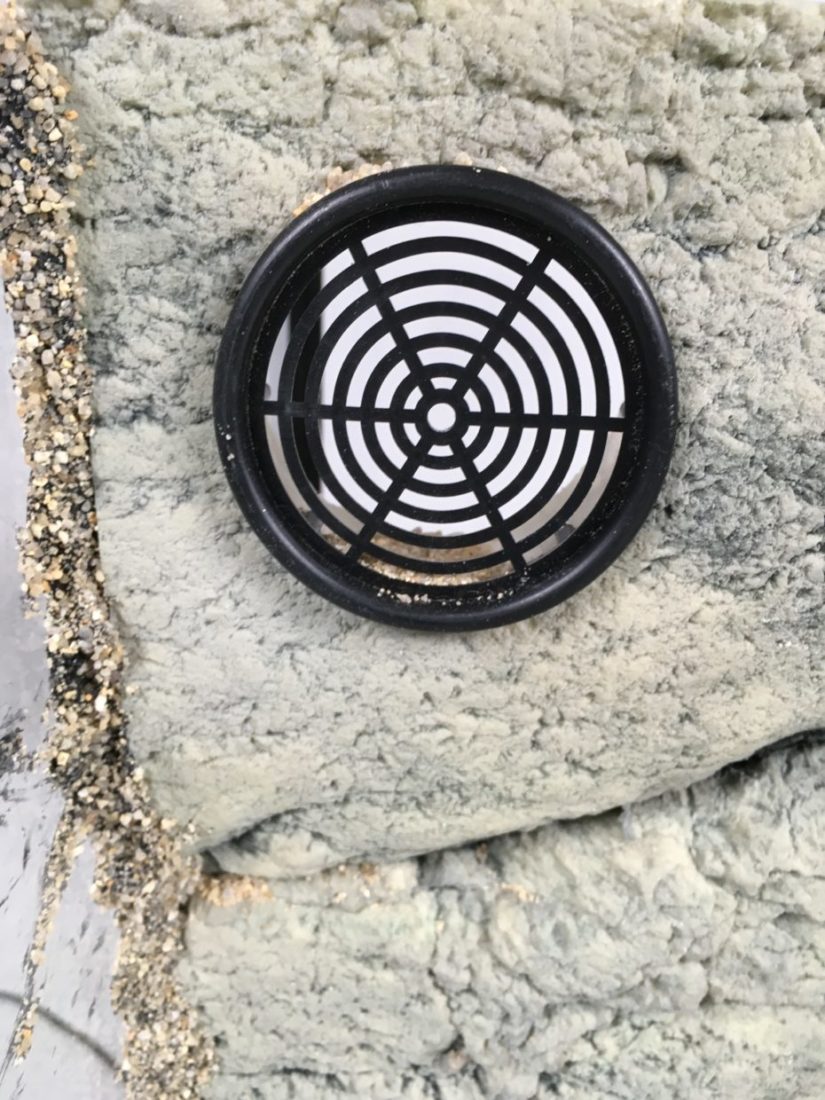
Depending on the size of the aquarium background, two or more inlet grilles are inserted into the 3D background. One at the water Level and Minimum one for suction from the open water. Position the inlet grids on inconspicuous surfaces sideways or under an overhanging stone. Use a 60mm rotary drill for drilling.
Enjoy now your brand new Back to Nature background! One of the advantages with Back to Nature backgrounds is that you can build a biological filter behind it yourself. These filters are more powerful than conventional filters, simply because of their size, and often cheaper. They can work without cleaning for up to ten years.
Ready!

